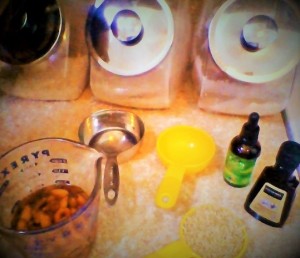
If you can run a blender and sit and wait, you can make almond milk. If you can also boil water, then my friend, you can make rice milk. Ingredients? Almonds, water. Or, rice, water. Extra credit? Add stevia and vanilla extract. Now we are getting crazy.
A gorgeous friend of mine at work was sharing her new found joy of making homeade almond milks and nut butters. Being that my family goes through 4 cartons a week of Almond milk, I figured, I’d give it a go. You know when you try something new, and then you find out how easy it is and how much money you can save, you have one of those V-8 moments? Wow, I should’ve figured this out sooner! This was one of those.
WHY would anyone make homeade almond milk? Well, it’s way cheaper. I bought a huge bag of almonds from Costco for 14.99 and I’m only a quarter of the way through it after making three batches of almond milk and one jar of almond butter. ( Priced that stuff lately?) Also, it doesn’t have any weird additives, like carageenan (which I thought was harmless seaweed, but it never really is, is it?)
So to get started, you need measuring cups, a pot and water (please use filtered, which you obviously already have on hand.) A blender, a seive, and almonds and brown rice. I’m going to go ahead and walk you through both at the same time, since that’s the way my kitchen experiments tend to roll. A pitcher will also come in handy, although I am using an old large camping water bottle since I only have one pitcher on hand at the moment. (Added to grocery list.)
Here we go:
- put a 1/3 cup almonds in a measuring cup and add water to soak. Do this earlier, like that morning or the night before. You can get away with doing it now for the first time, while you work on the rice milk.
- boil 1 cup of water. as soon as it boils, add 1/3 cup brown rice. It’ll boil quickly, so stay on hand to turn it down to low and cover. Let it simmer for 40 minutes. If you are an ADD adult like me, please set a timer. Wait 40 minutes, write a blog post or something.
- Woah! See, when you are busy, that timer goes off fast! Drain any water from the soggy rice, and add some water,around 2 cups, and blend it in a blender. 3 minutes.
- add another cup or two ( I like two) of water and blend again. You’ll get the hang of how much water to add. I kept adding more after my first batch after we were drinking it out of the fridge until I had the taste right.
- After sitting for 30 minutes, spoon off any rice film from the top if it formed, and drain the stuff through a seive, or even better, some cheesecloth. I’ve been using a seive since I have one, and doing a few carefully decanted strains. It still gets a little grainy at the bottom (especially with the almonds), so I am in the market for cheesecloth, but it’s not a deal breaker.
- Wait thirty minutes again (I’ll bet you never realized you could get so much housework done while making milk!) spoon off any more film if needed, and strain again into your refigerator holding vessel of choice. Be careful not to let the thick stuff at the bottom dump in, but don’t worry too much about it. Add your stevia and vanilla if wanted, (about 10 drops, 1/2 tsp respectively) or to taste.
- Okay! Refrigerate and get to the almonds!
- Take your soaked almonds and drain. Stick them in the blender with a cup of water and pretty much repeat the rice process. (As followed)
- blend 3 minutes, add 2 cups, blend 2 minutes.
- sit for 20 minutes, then strain strain strain.
- sit again, strain again.
- Add your flavor as needed, choose your vessel, and refrigerate.
TAH DAH! You are now a dairy free milk maker- CERTIFIED!(by nothing, but you have my blessing.)
Don’t be afraid to tweak, I ended up adding water to my rice milk and it improved drastically. My Martha Stewart/Pinterest Beaty Queen friend has experimented well with adding blueberries and other amazing things to her almond milk. I’ll be having fun with that stuff too, but for now, I’m just stocking the fridge. I am looking forward to getting a better straining process going, and I need to tweak my stevia amounts a tad. I’m also in the market for some cool pitchers to keep in the fridge. Right now my system looks a little Survivor/Canteen, but no one cares.
Along with my friend (We’ll call her ‘Joann,’) I’d like to thank the internet and one of my trusty cookbooks by the Happy Herbivore for a little guidance.
Please enjoy yourself in the kitchen, and never get stressed out. This is fun. Demistifying the idea that daily items need to be made in some magical facility brings me so much joy, and I will be happy to pass along any info I deem worthy of a household’s attention. We are all looking for ways to make life easier, friendlier, safer, and cheaper. Word to the Bird.

